This post was expanded and updated by Dr. Ashley Rawlins, PT, DPT, on October 9th, 2023.
There's a lot more to your core than the so-called “six-pack” muscles. Core muscles bring stability and strength to your trunk and include your back extensors, glutes, diaphragm, and pelvic floor, just to name a few. These muscles work together to stabilize your spine, pelvis, and ribcage in order to provide a solid foundation for the movements of your legs and arms.
While many muscles make up the core, the deepest layer of your abdominal musculature, your transverse abdominis, has an especially important function. The transverse abdominis (TVA) extends from your lower ribs to the top of your pelvis, and its horizontal fibers wrap around your abdomen like a built-in back brace.
Research shows that isolating and strengthening your transverse abdominis can have especially important benefits — a strong core and TVA has been shown to decrease back pain, improve your balance, reduce risk of injury, and positively impact your posture and breathing.
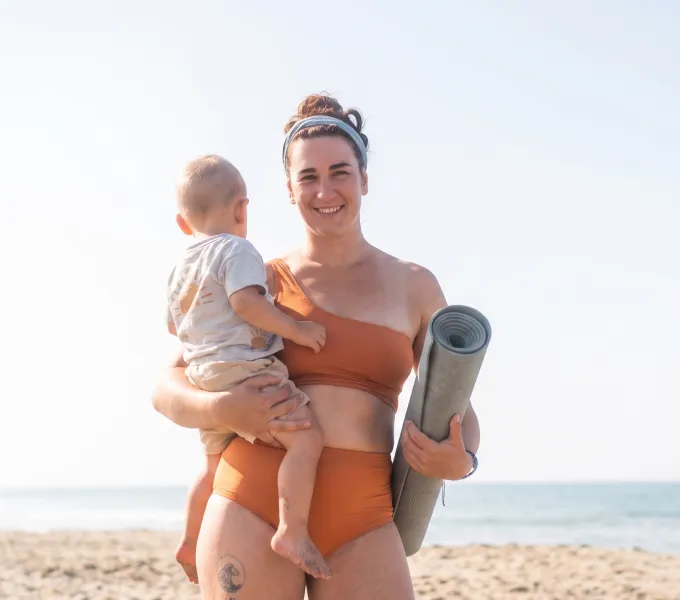
Whatever life demands of you, whether that involves standing on your feet 8 hours a day for work, lifting and lowering a 40-pound child into a car seat, carrying an extra 30 pounds during pregnancy, or hiking the Appalachian Trail, having a strong core will make it all possible.
Scroll down for detailed exercise instructions and videos, or watch the whole workout below.
Why Targeting Your TVA is so Important
The transversus abdominis or TVA is a critical component of your core musculature. It's a thin, sheet-like muscle that wraps around your abdomen like a corset, running horizontally from your lower ribs to your pelvis. Unlike the more superficial ab muscles, the TVA's primary function is not to flex or rotate your trunk; instead, it acts as a stabilizer and provides essential support to your spine and pelvis.
Here are some reasons why the transversus abdominis muscle deserves your attention:
- Core Stability: The TVA is your body's natural shapewear. When engaged, it draws in your waist, and increases intra-abdominal pressure to help stabilize your spine and pelvis. This stability is crucial for maintaining proper posture, preventing lower back pain, and reducing the risk of injury during physical activities.
- Pelvic Floor Support: The transversus abdominis works in harmony with the pelvic floor muscles. Together, they create a strong foundation for your pelvic organs. A well-functioning TVA can help prevent issues like incontinence and pelvic organ prolapse, particularly in women.
- Improved Breathing: Your TVA plays a role in the mechanics of breathing. By allowing it to lengthen as you inhale, the TVA helps regulate your diaphragm's movement, enhancing your ability to take deep breaths and maintain optimal oxygen exchange during exercise and daily activities.
- Enhanced Athletic Performance: A strong and responsive TVA is essential for athletes of all levels. It provides the stability and power transfer necessary for activities such as lifting weights, running, and jumping.
- Flat Abdominal Appearance: While not its primary function, training the TVA can lead to a flatter abdominal appearance,by improving the support of your abdominal organs, and is key to helping heal separated abdominals which are common after pregnancy, also known as diastasis recti.
To effectively target and strengthen the transversus abdominis, it's essential to perform specific exercises that engage this muscle directly. Incorporating exercises like those mentioned below into your fitness routine will help to activate and strengthen the TVA.
The Deep Core Workout to Start Doing Now
To strengthen your deep core and deep pelvic floor, engage in exercises that target your transverse abdominis (TVA), the deepest of your abdominal muscles. Before jumping into a more advanced core workout routine, start with the 7 exercises below to ensure that you're building on a solid foundation.
If you're concerned that you might not be targeting all the right muscles or you have trouble knowing if you've found your transverse abdominis, reach out to a physical therapist to help you learn to isolate and activate your deep core.
1. TVA Activation, aka Abdominal bracing
When activating your deep core, keep in mind that the fibers of the TVA are predominantly horizontal, so there should not be much movement of your ribs or pelvis when activating this muscle. Instead, as you activate your TVA, you should feel your belly pull in towards your spine. Try not to hold your breath, it may help to exhale with a loud "shhh" sound as you engage your TVA. Consider practicing activation of this muscle prior to exercises or activities like changing the water cooler in the break room.
How to activate your TVA:
- Start seated in a chair with your feet flat and hip distance apart and your hands placed on your lower belly.
- Inhale and feel your belly expand, filling your cradled hands.
- Exhale and pull your belly up and in towards your spine and away from your hands to activate your Transverse Abdominal muscle.
- Inhale and release.
Note: If you are pregnant and have been placed on bed rest or exercise restriction precautions, speak with your OB before attempting this exercise.
2. Goblet Squats
There are lots of benefits linked to weight lifting, such as increasing bone density for reduced risk of osteoporosis and improving body composition to reduce the risk of type 2 diabetes. In addition, working with free weights happens to be an excellent way to activate and strengthen your deep core muscles like the TVA and multifidus, one of the deepest layers of muscles in the back. So grab some dumbbells, soup cans, or a baby and start lifting! Just remember to try to keep your back tall, your gaze forward and always start small and progress slowly.
How to do a goblet squat:
- Using both hands, hold a weight close your chest and stand with your feet slightly wider than hip distance apart with toes slightly turned out.
- Pull your belly button in towards your spine to activate your core.
- Keeping your core engaged, push your hips back and bend your knees to drop into a deep squat position.
Tip: Try to keep your back straight and chest facing forward throughout. - Hold this pose before squeezing your glutes to straighten your legs and return to standing.
3. Marching Bridge
How to do a marching bridge:
- Begin by laying on your back with your knees bent and legs hips distance apart.
- Exhale, and lift your hips up into a bridge position.
- Lift one leg up to a table top position while keeping your hips level.
- Repeat with the other leg.
Tip: Make sure that your belly button is pulled in towards your spine and activated for the duration of the movement. And aim to keep your hip bones level, as if you are balancing a glass of water on your pubic bone.
Note: This exercise targets both your TVA and your multifidus. Together, they help bring stability to the vertebrae of your spine.
4. Bird Dog
How to do bird dogs:
- Start on your hands and knees, with your hands under your shoulders and knees under your hips. Position your knees hip-distance apart and focus your gaze between your hands.
- Exhale, and draw your belly button in toward your spine, engaging your core as you extend one leg back and the opposite arm forward. Tip: Keep your hips level and avoid rotating them as you extend. Your core stays activated the whole time.
- Bring your leg and arm back to the starting point.
- Repeat with the alternate arm and leg.
Note: While performing this movement, imagine there is a glass of water resting between your shoulders and on top of your pelvis, be sure to have enough control and slow enough movement to prevent any spilling!
5. Side Planks
How to do side planks:
- Lie on your side with your legs straight and stacked on top of each other, then prop yourself up onto your bottom elbow. Your elbow should be directly underneath your shoulder with the hand and forearm resting on the floor. Tip: Try to keep your shoulders, hips, and feet in a straight line.
- Pull your belly button in towards your spine. Keeping your core engaged, squeeze your glutes to lift your hips up off of the floor.
- Slowly lower your hips back down to the floor. Tip: If keeping your feet stacked is too difficult, try putting your top foot on the floor in front of your bottom foot, touching heel to toe.
Note: This is a full-body exercise that activates your core, back, glute muscles, and shoulder stabilizers! If this produces pain, consider modifying the exercise by bending your knees and lifting from the elbow and knee instead.
6. Deadbug
How to do dead bugs:
- Lie on your back with your arms extended toward the ceiling (wrists directly over shoulders) and your legs bent at a 90-degree angle (knees directly over hips).
- Draw your belly button in towards your spine to engage your core. Try to keep it engaged throughout the move.
- Exhale and slowly lower your right arm and left leg until they are extended straight out, just above the ground.
- Inhale and bring them back to starting position.
- Repeat with your left arm and right leg.
Note: For increased activation, hold a yoga ball in the air by pressing it against your knees with the palms of your hands. Firmly press into the ball in order to hold it in place above your torso throughout this exercise.
7. Roll Outs with Stability Ball
How to do roll outs:
- Kneel with both knees directly beneath your hips and place a stability ball directly in front of you with your hands clasped together and resting on top of the ball.
- Pull your belly button in towards your spine to engage your core and keep it engaged throughout the motion.
- Using your arms, begin rolling the ball away from you. As the ball rolls, your forearms will press into the ball, followed by your elbows. Keep your shoulders, hips and knees in a straight line as your body lowers toward the ground. Tip: Keep your shoulders down and back and away from your shoulders and do not hold your breath.
- Stop the ball from rolling any further once you have lowered your torso into a modified plank position with good control.
- Use your arms to pull the ball back towards you, keeping your back straight as your return to a kneeling position.
Note: Keep your hips, shoulders and knees in a straight line throughout this motion; avoid pushing your hips up in the air, shrugging your shoulders up towards your ears or letting your hips fall towards the ground as you roll back and forth.